ADA Vanity Sinks for Multifamily Builds

ADA bathrooms get a bad reputation for looking institutional and uninviting.

But there are more options than ever for attractive and accessible fixtures. So ADA bathrooms can look just as luxurious as any other unit in your next multifamily build.

The trick is knowing what to look for, and how to frame it right. Wondering how to install an ADA bathroom vanity sink that looks great while complying with regulations? You’ve come to the right place.

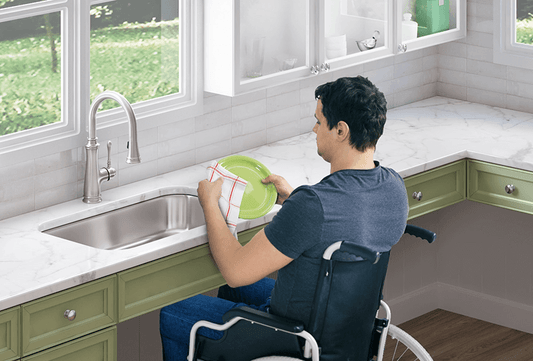
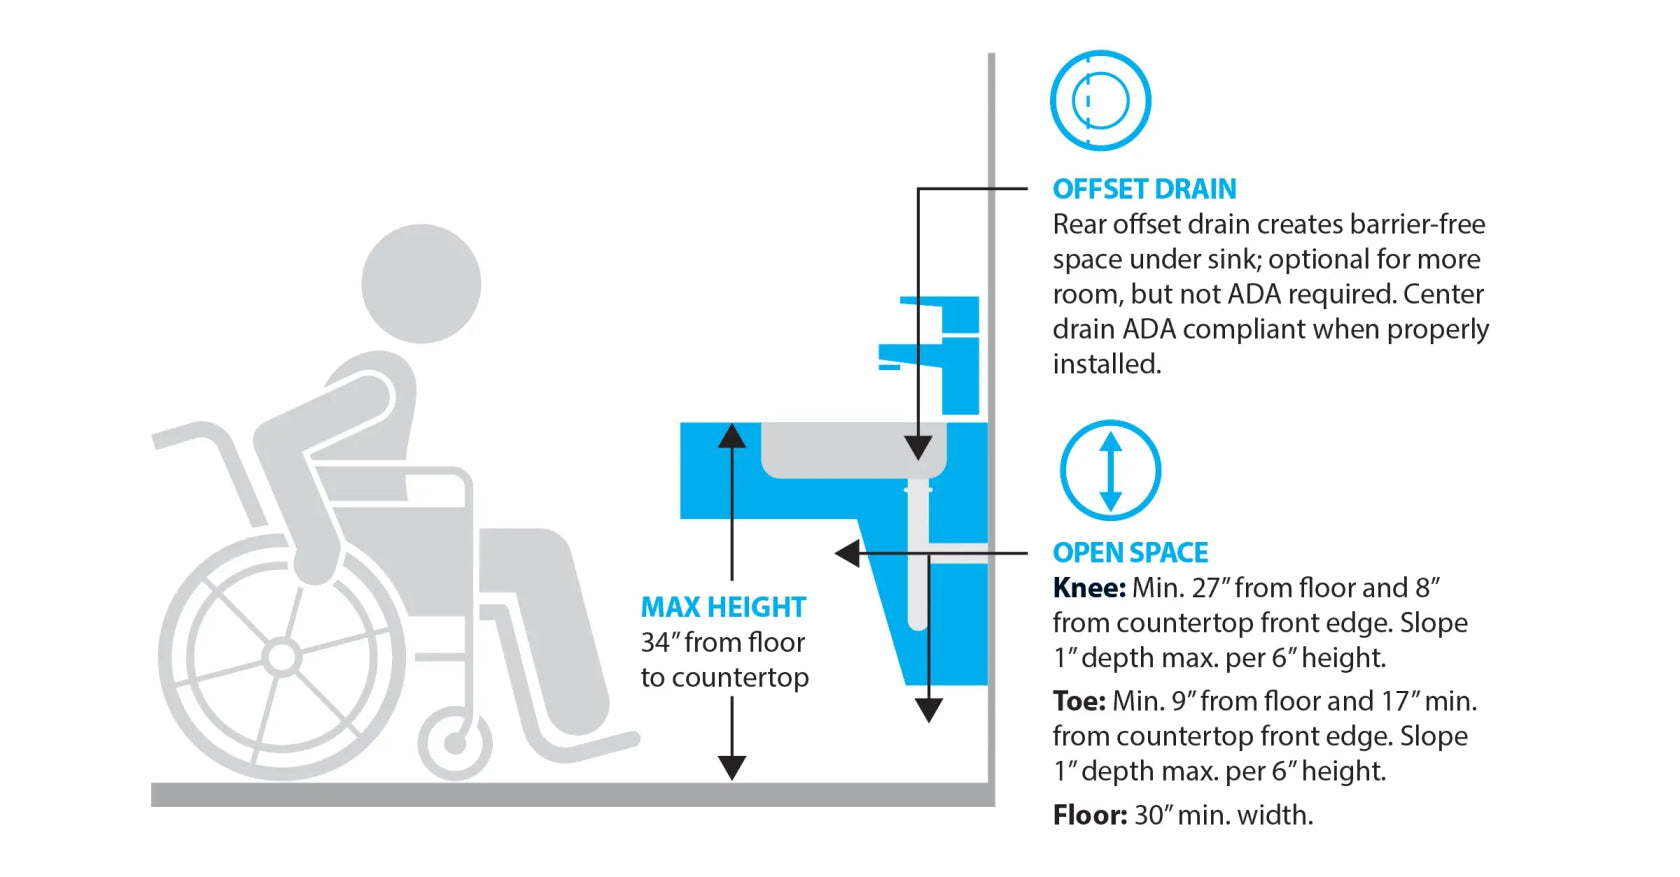
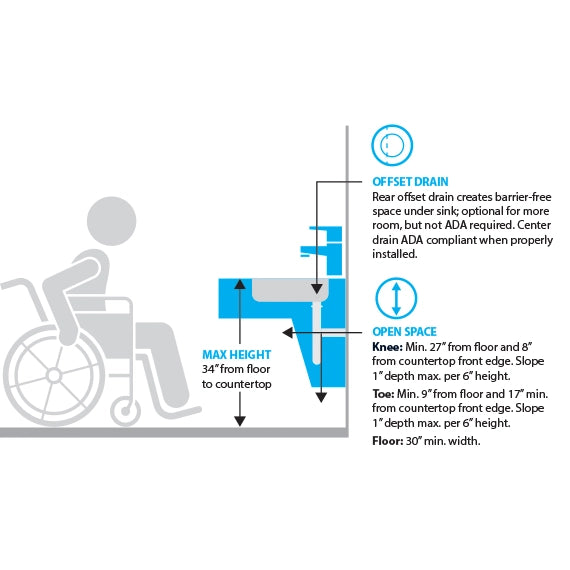
First Things First: ADA Bathroom Sink Specs

To be ADA compliant, specifically for a front approach, the sink needs to be easy to use from a seated position. 

That means 

  1. There’s enough room under the sink for a person in a wheelchair to pull all the way up without running into anything with their knees or toes.
  2. The sink height is low enough that a sitting person can reach the faucet and all areas of the sink 

That’s why standard vanities and sinks don’t meet ADA compliance. 

To be ADA-compliant, a sink needs: 

A maximum height of 34” from the floor, including the lip of the sink.

At least 30” of clear space (width) under the sink for knees and toes 

Knee space that is:

  • 27” or more from the floor to the underside of the sink or counter.
  • 8” or more from the front edge of the countertop before running into any cabinets or pipes.

Toe space that is:

9” or more from the floor to the underside of the cabinetry.

17” or more from the front edge of the counter to the back wall or cabinetry.

  • Pipes covered or insulated to prevent scrapes and burns.
  • An offset drain to keep the knee space clear.

You’ll also need to leave enough open floor space in front of the sink to make it easy to approach in a wheelchair.

Check out our Comprehensive ADA Bathroom Design Guide for more details about accessible bathroom layouts and links to the relevant ADA regulations.

What Kinds of Sinks Work for ADA Bathrooms?

Since standard cabinets come straight down from the front edge of the counter, they make it impossible to pull all the way up to the sink in a wheelchair.

There are three main options for making a bathroom sink area ADA compliant:

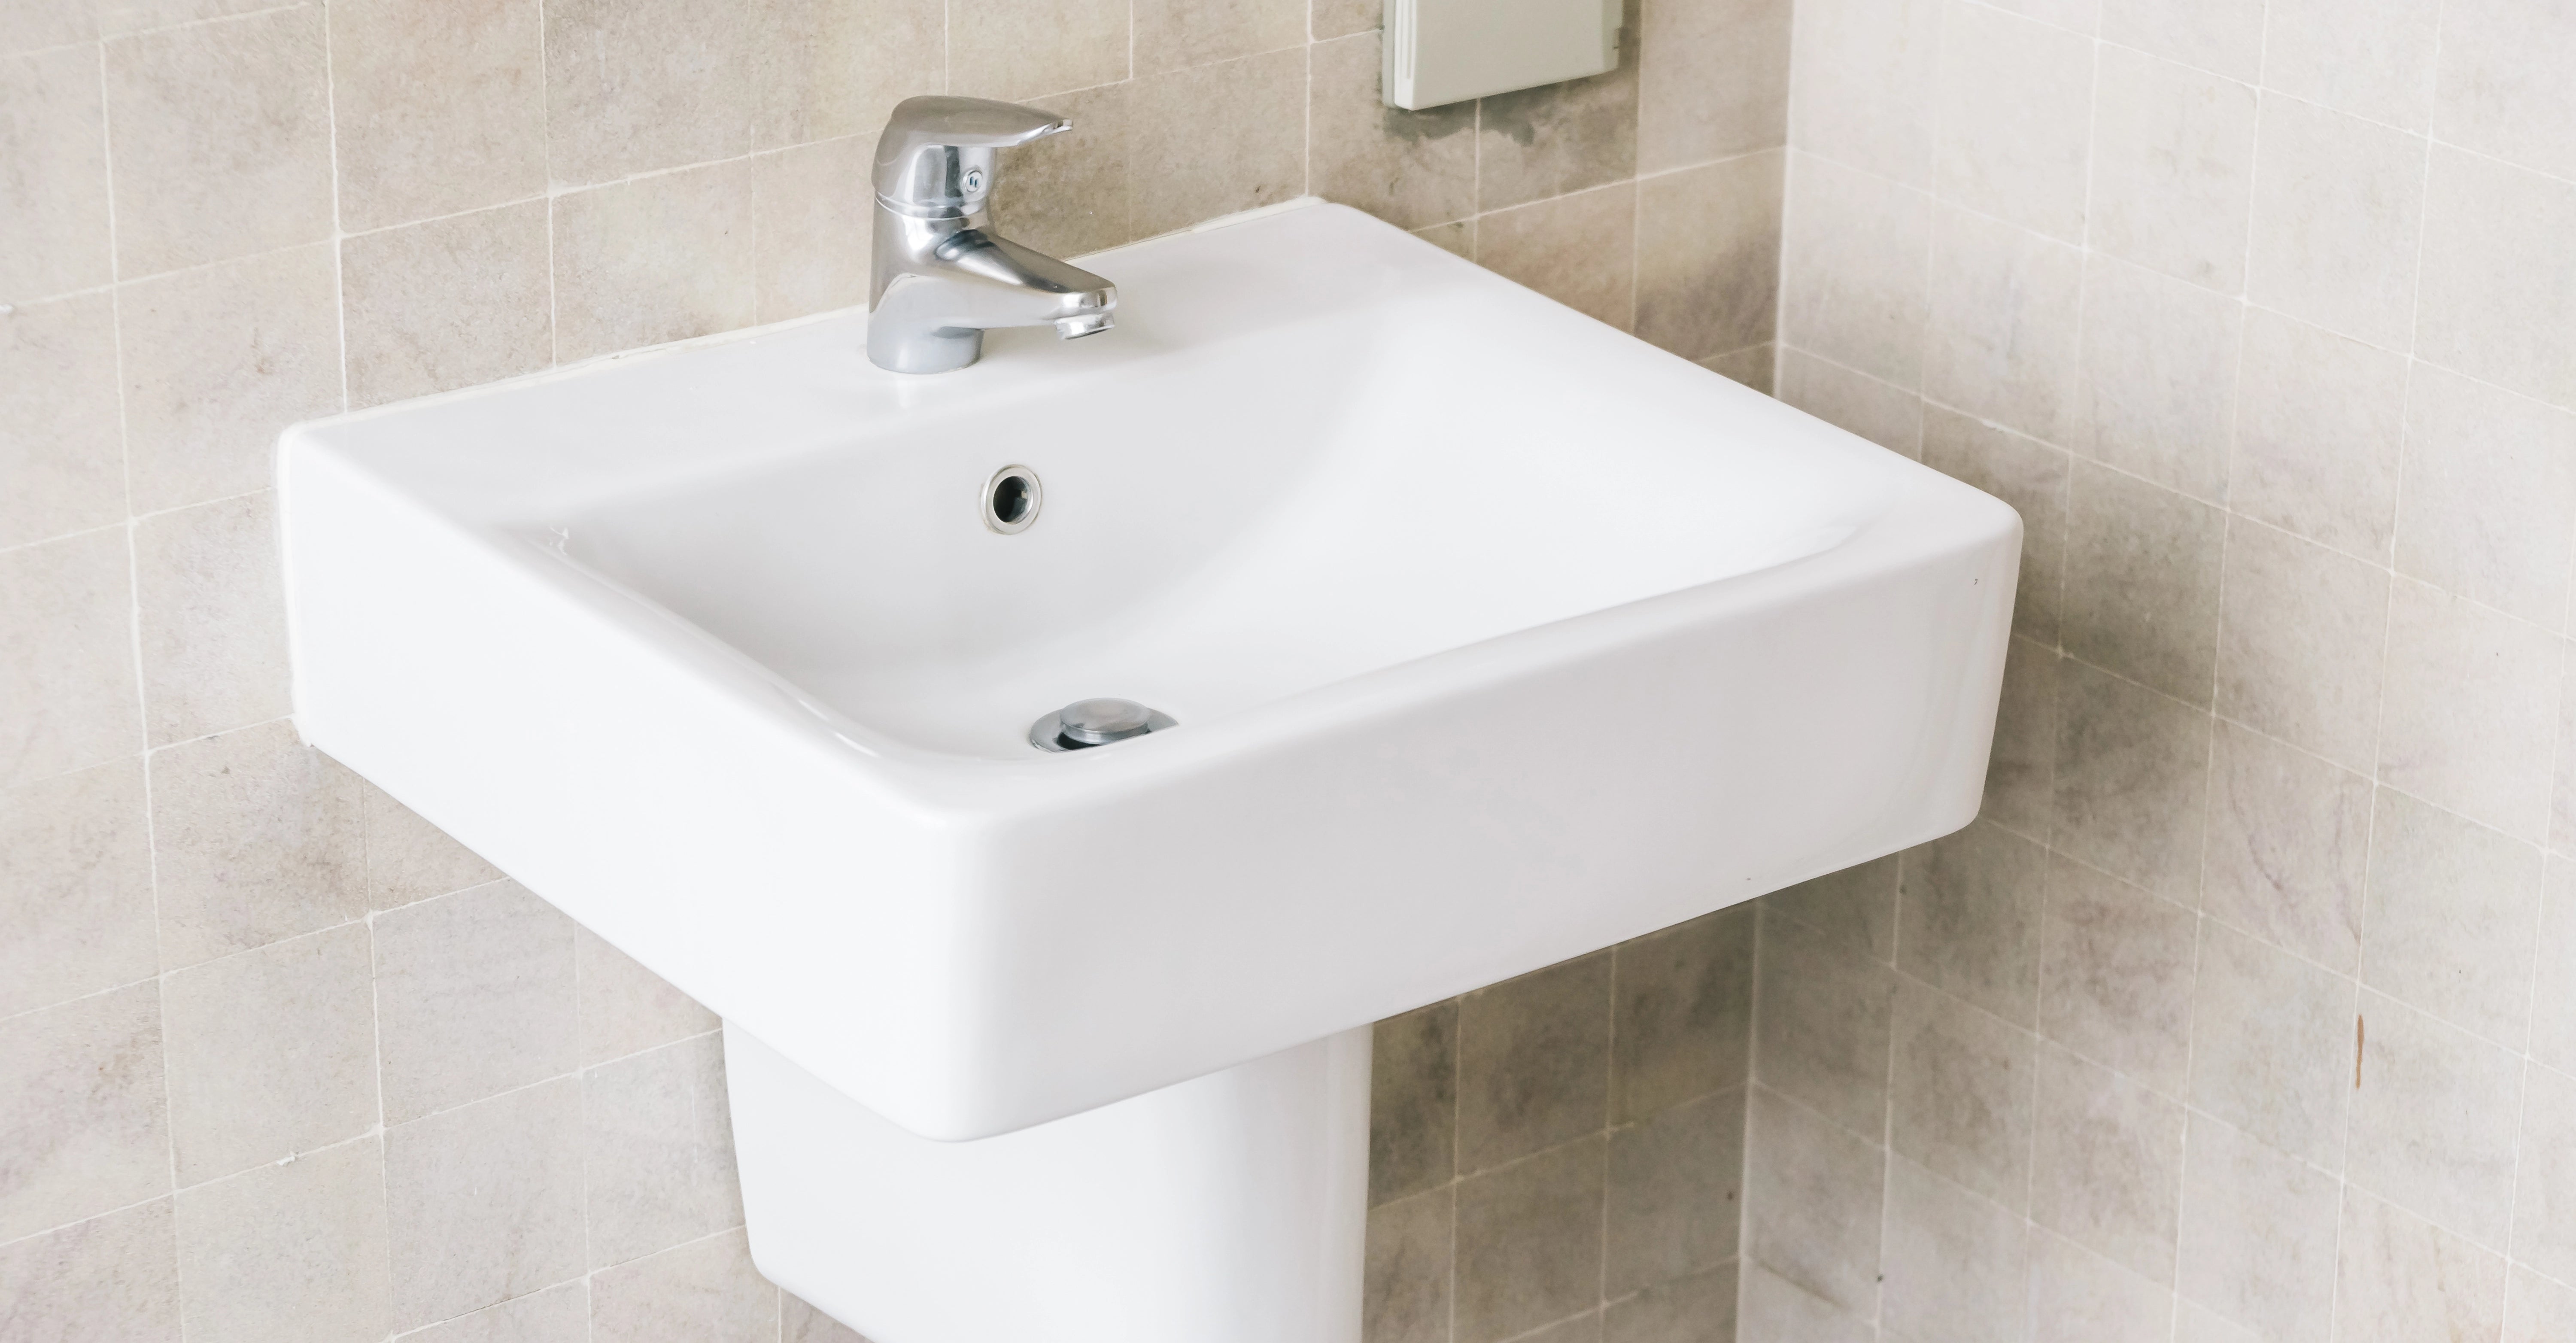
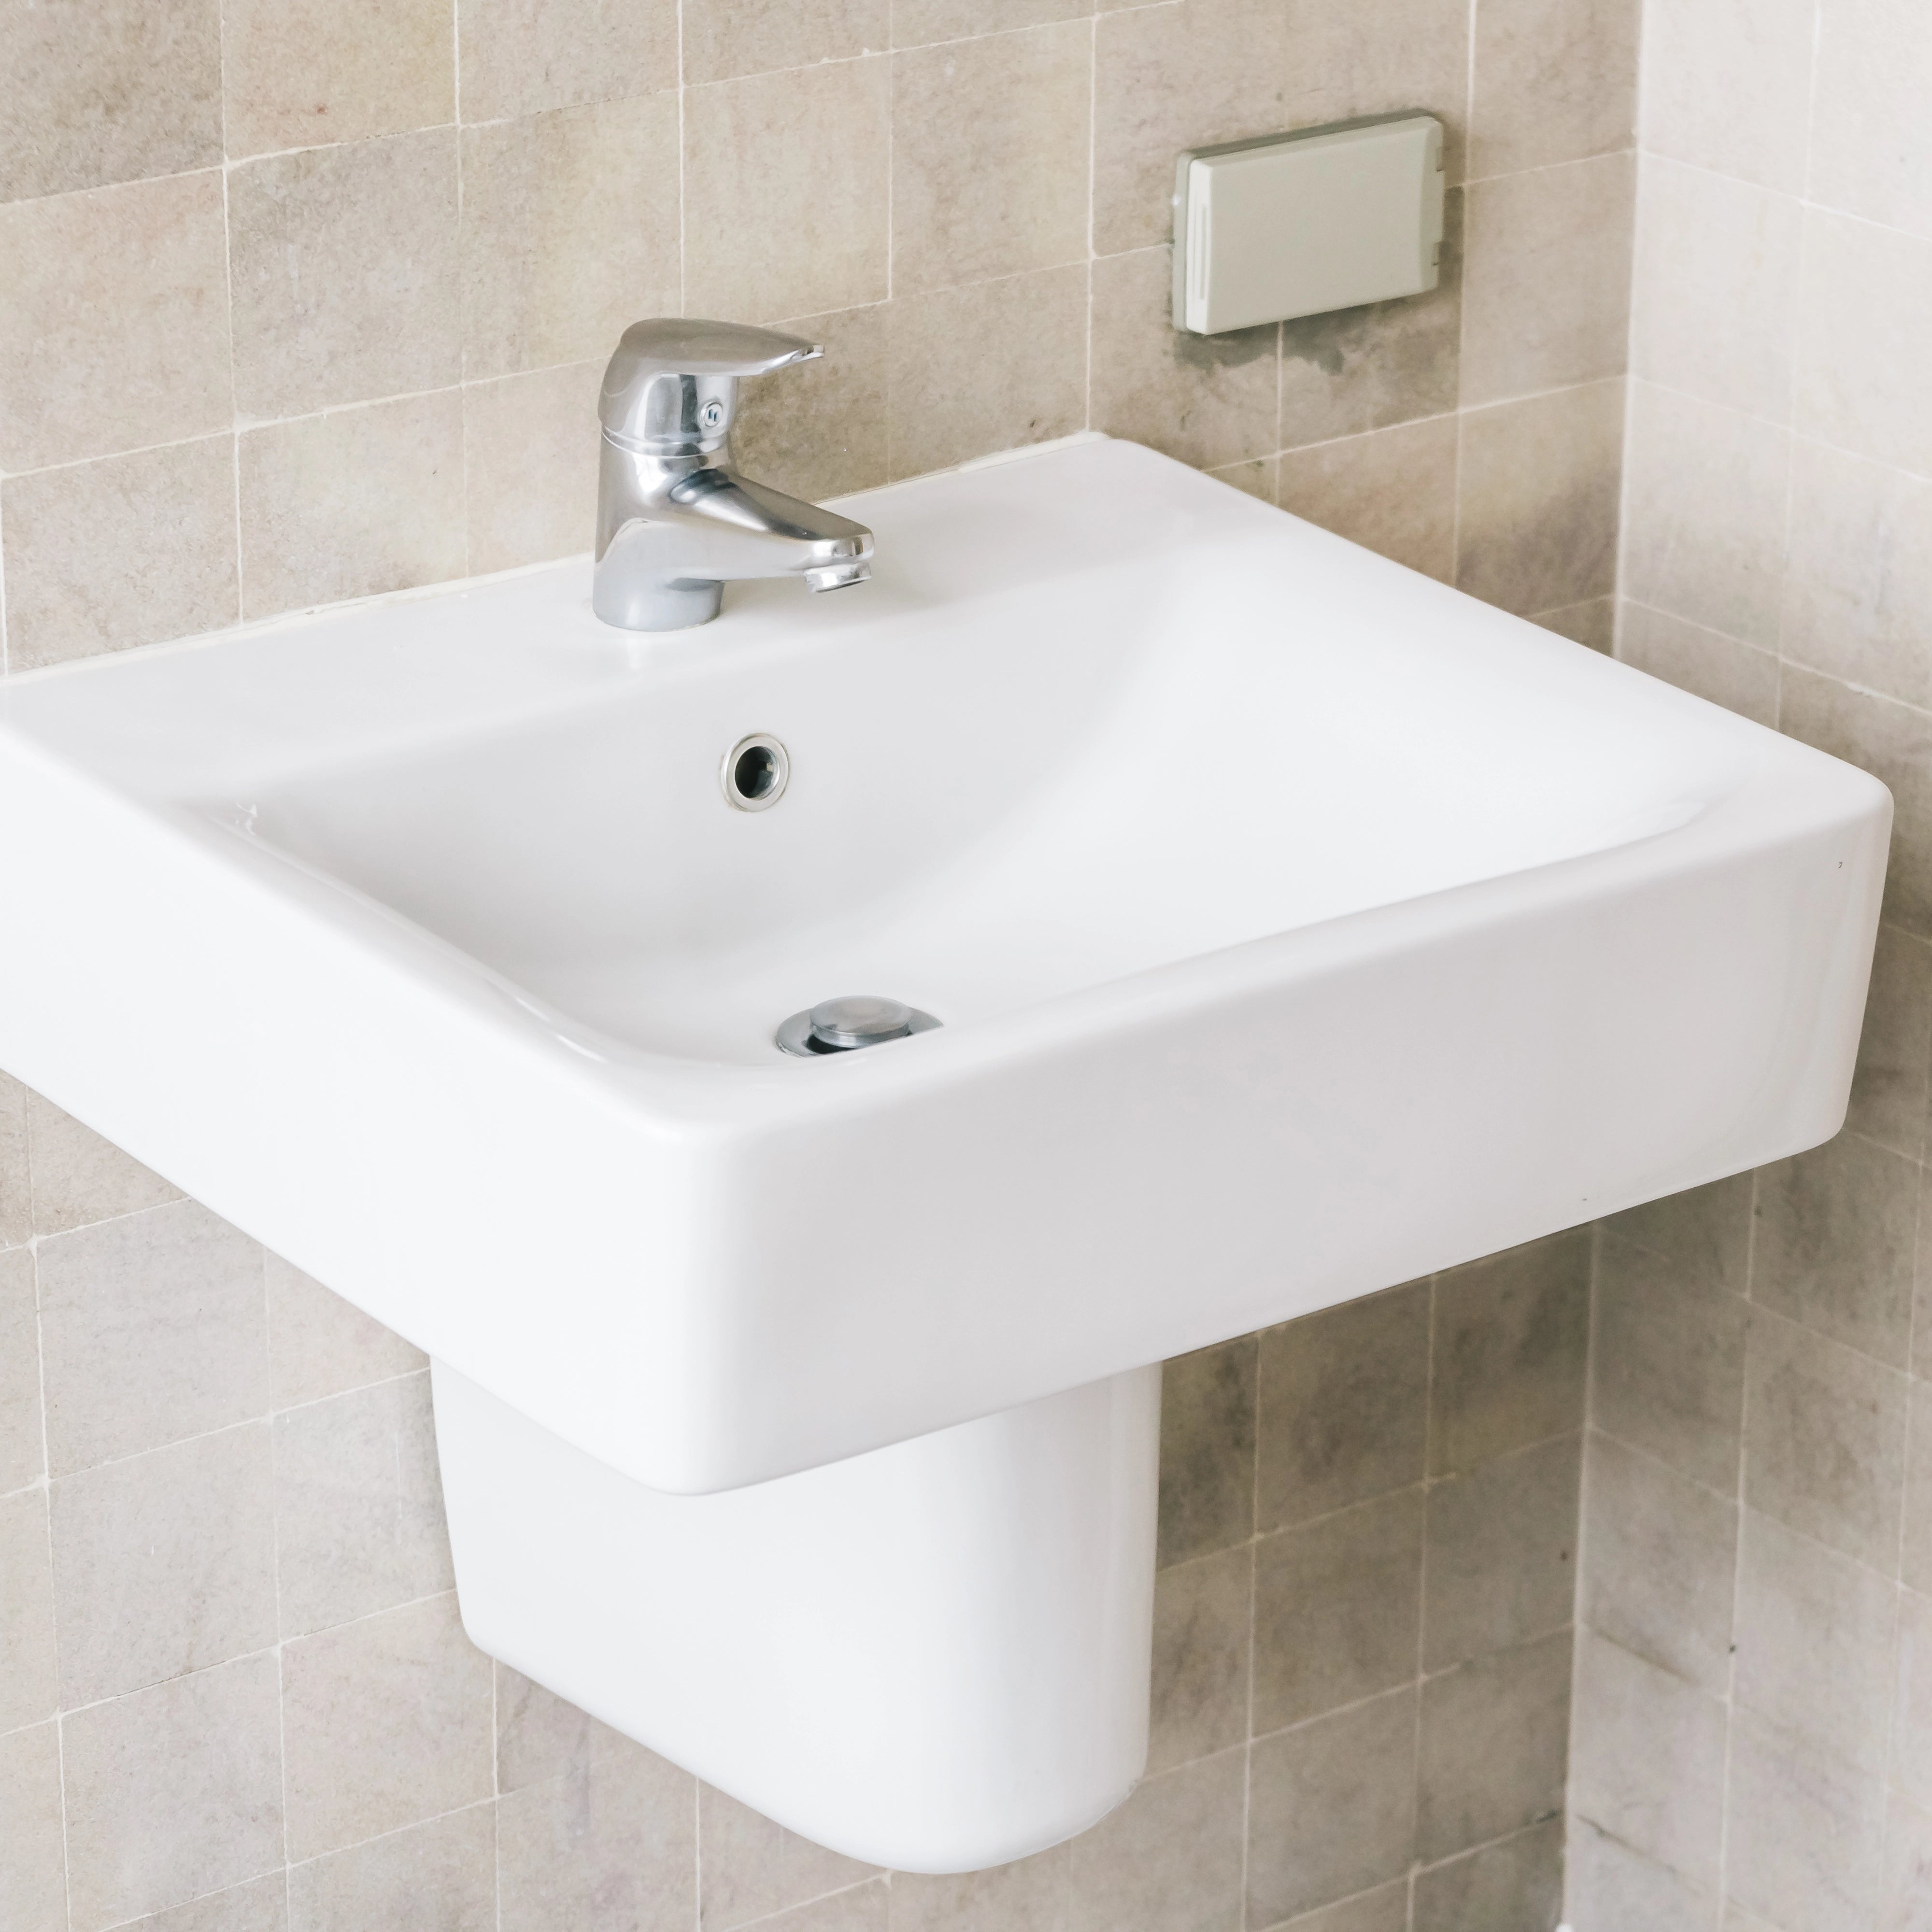
1. Wall Mounted Sinks

Technically, this obviously isn’t a vanity, but wall-mounted sinks are an easy option for keeping knee space clear. Just be sure there is no pedestal and the drain is set far enough back that it doesn’t interfere with the required knee space below the basin.

PROS:

  • This is the easiest option. As long as it’s installed correctly, you’re done.
  • Usually affordable: the basin may be more expensive, but you will save on the cabinet cost.

CONS: 

  • Few designs are available. Replacements can be hard to source.
  • Leaves pipes and supply lines exposed and visible, which may look unsightly once they’re insulated for safety.
  • Can look old fashioned.
  • No storage space.

How to make it work:

Other than finding an option that doesn’t look institutional or dated, the main drawback for residents will be the lack of storage. 

You can work around this with modular storage or floor cabinets in another area of the bathroom. Remember that cabinets in an ADA bathroom need to be accessible for wheelchair users.

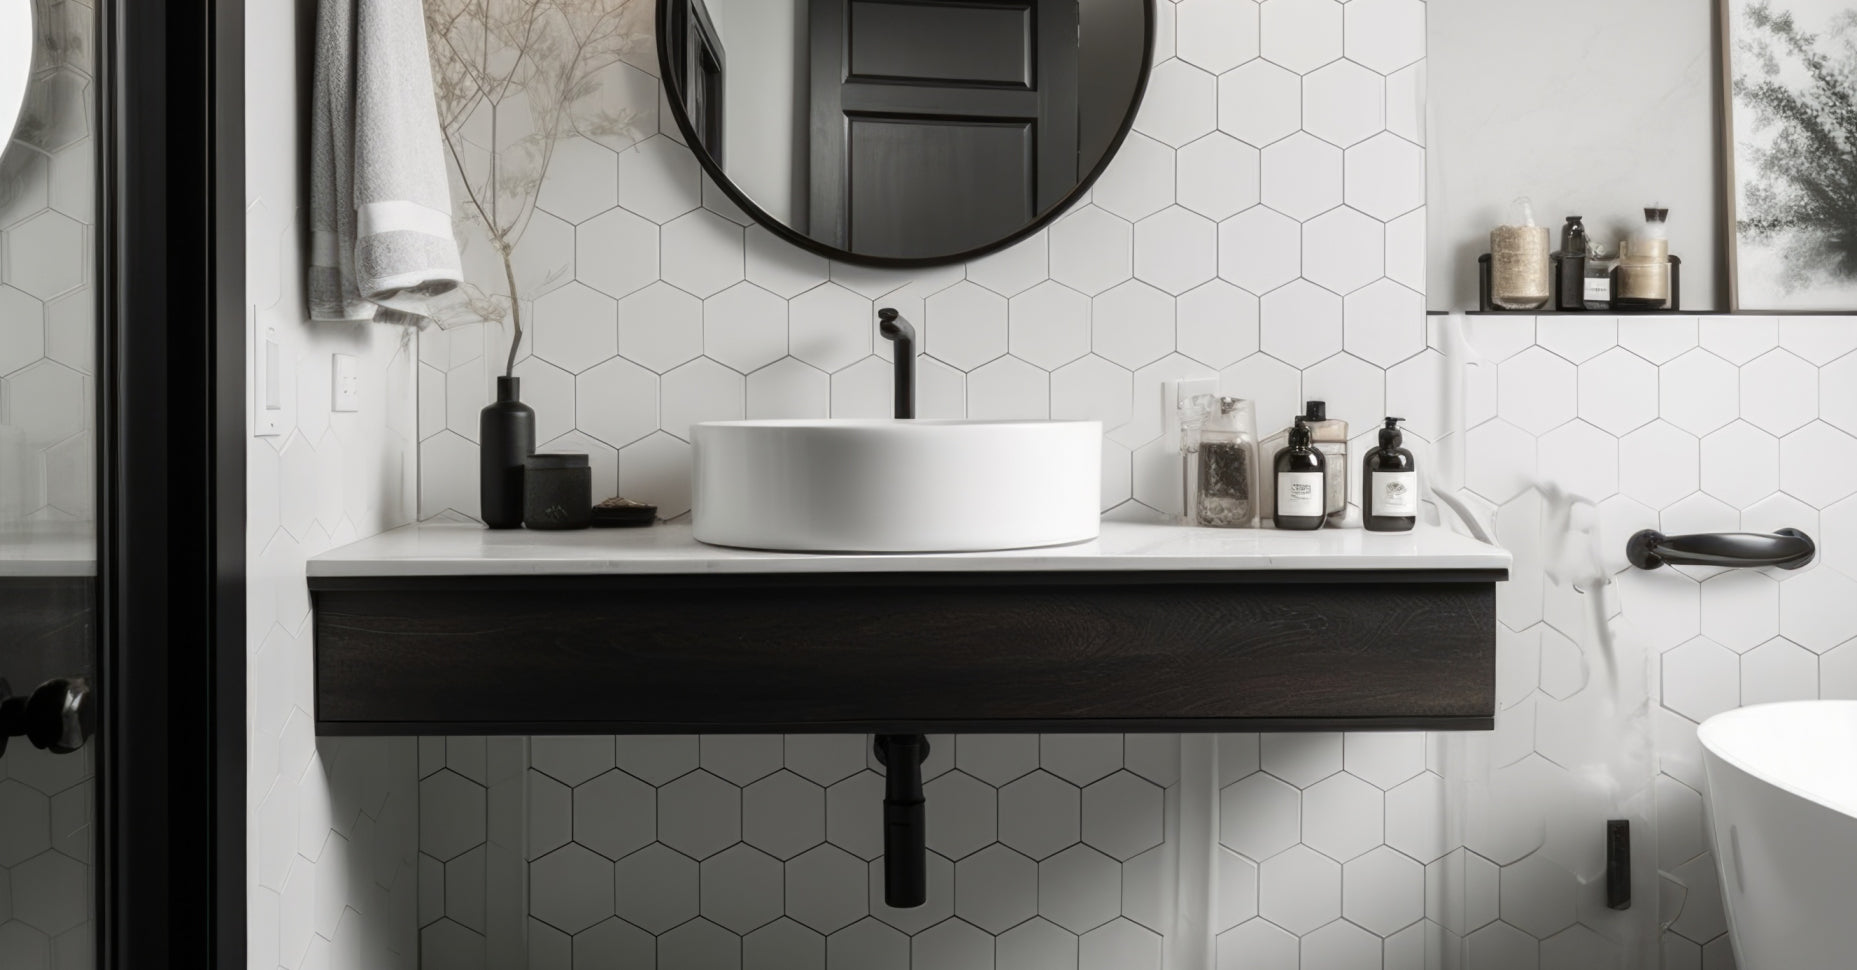
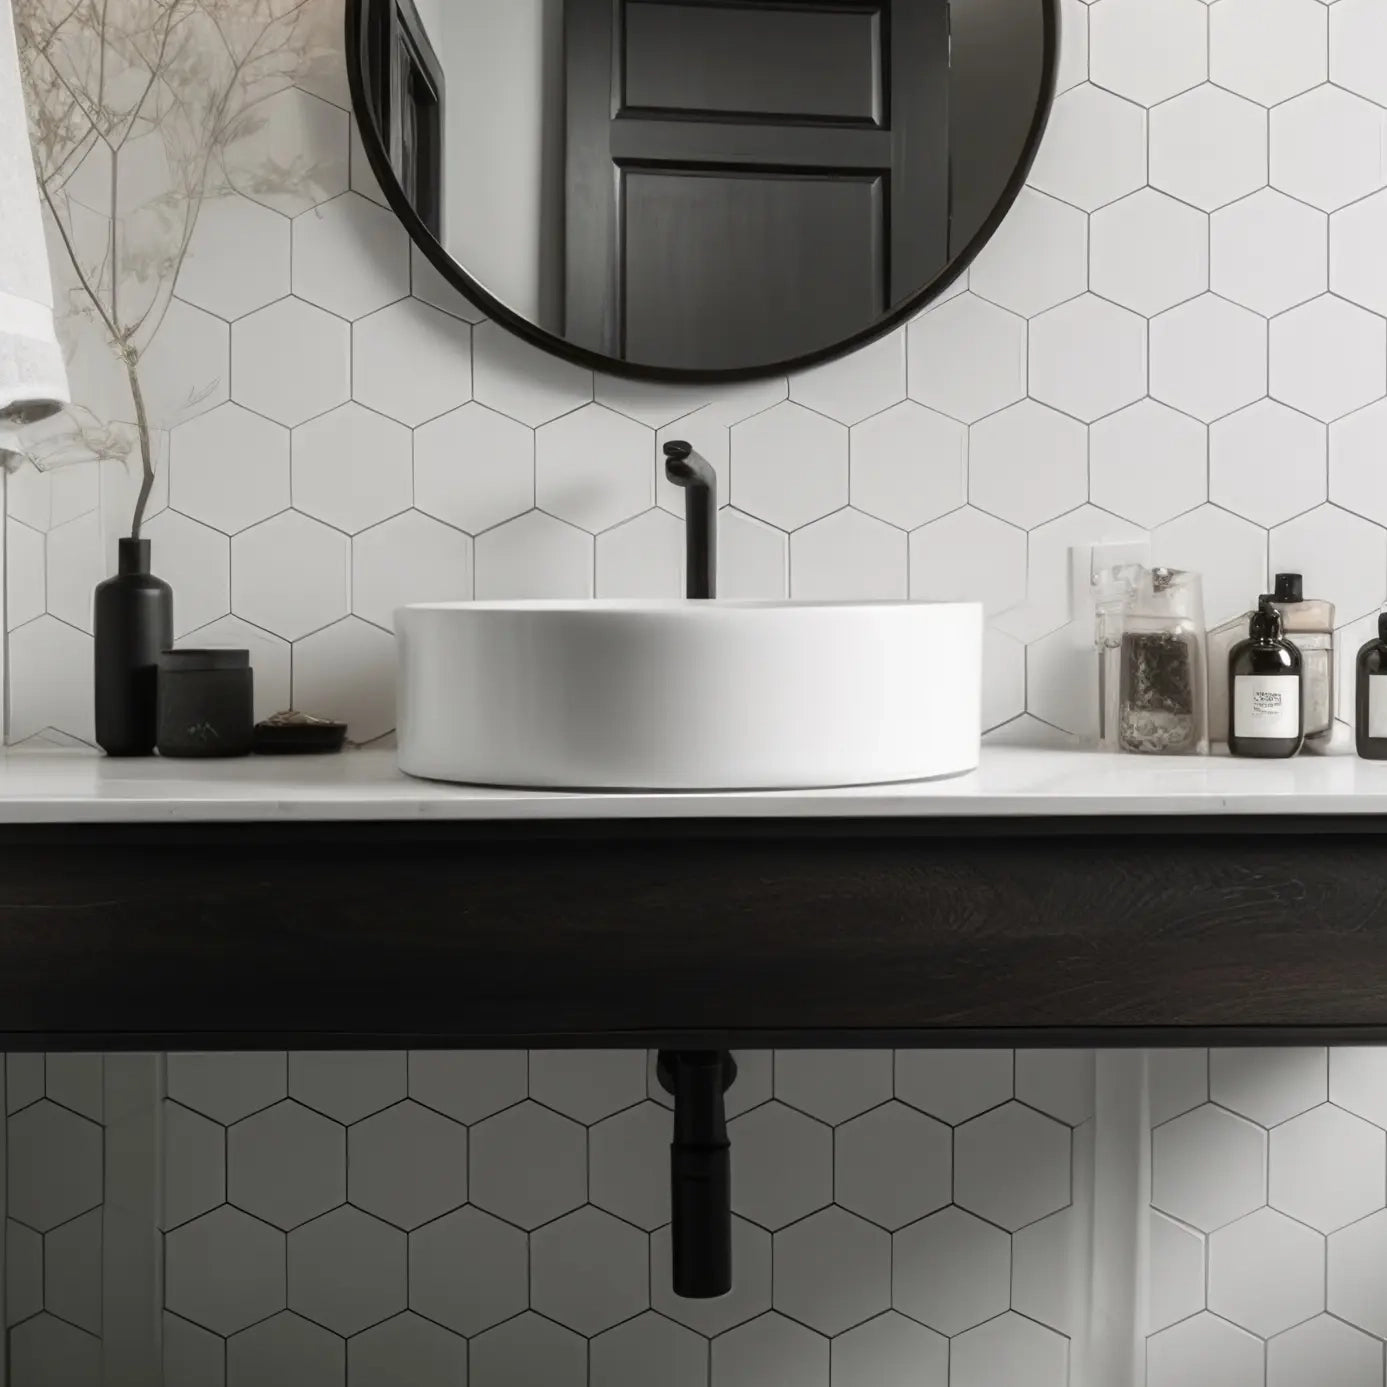
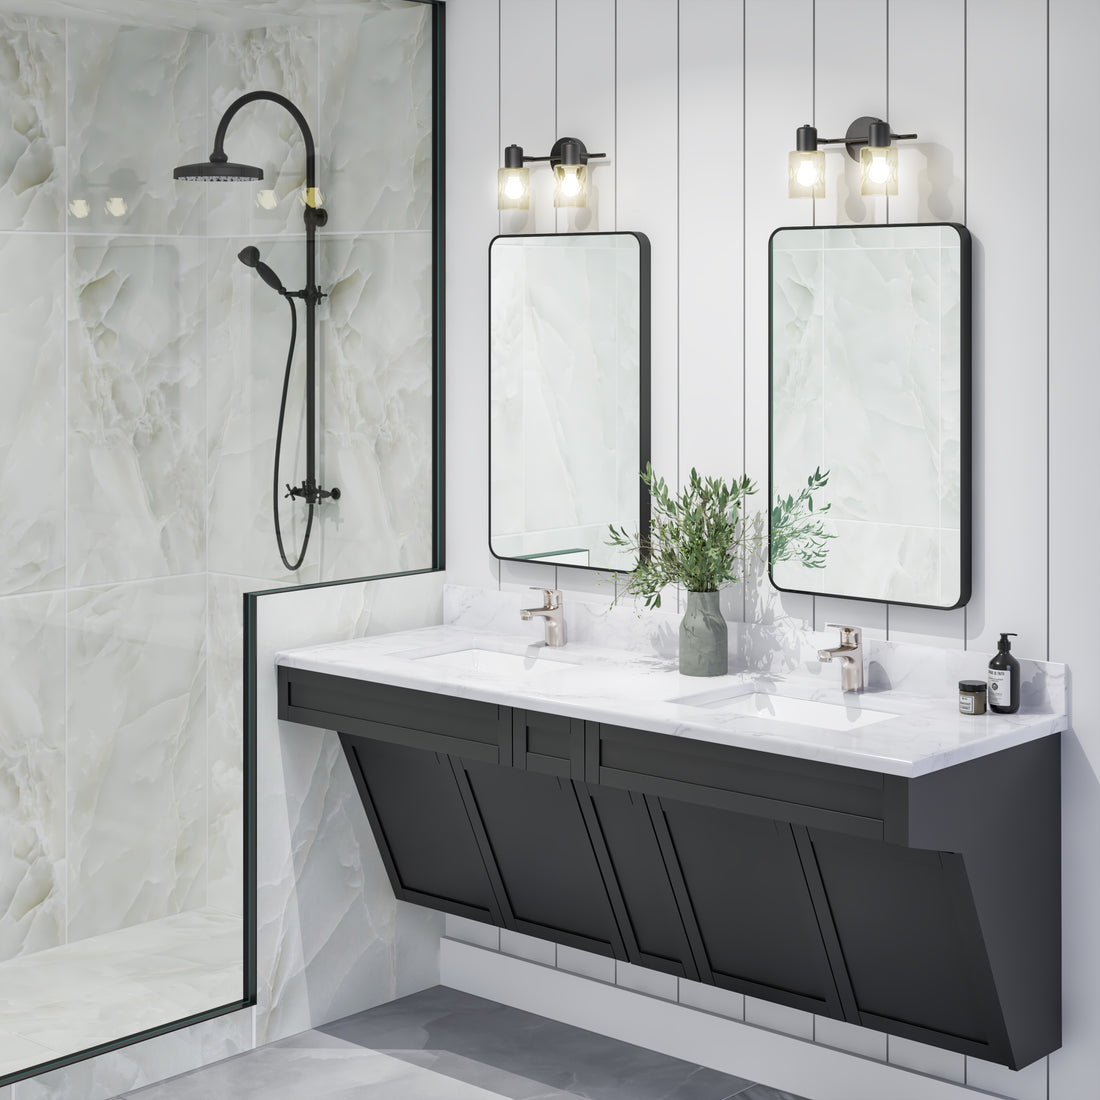
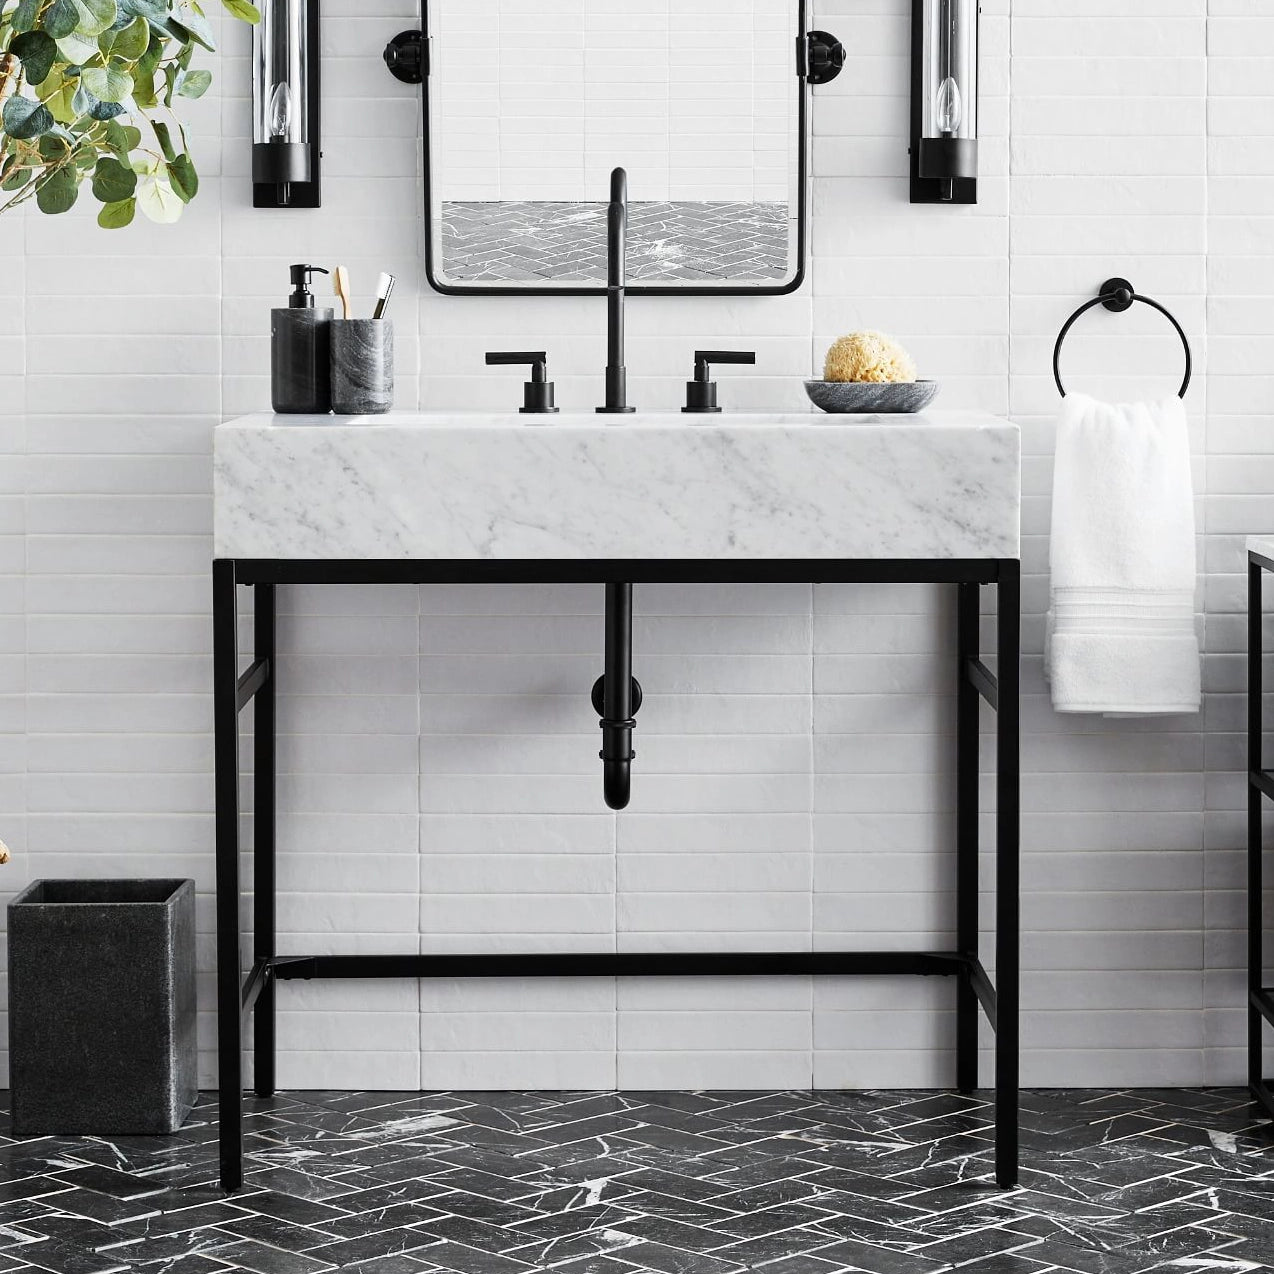
2. Table Vanity Sinks

Just like the name implies, a table vanity has legs rather than cabinet doors to support the counter top. Many companies make table vanities, and they’re fairly easy to construct in house.

PROS: 

  • This is a practical middle ground option. Can be inexpensive to create in house.
  • Can include storage to the sides of the open space under the sink.
  • Leaves you free to select a wider variety of basins and faucets (vs. wall-mounted).

CONS:

  • Drain pipes and supply lines will need to be covered/insulated for safety. But they won’t be as visible as with a wall mounted sink.
  • May collect dust, hair, and debris where the legs meet the floor (hard to keep clean).
  • Doesn’t suit every design aesthetic.

How to make it work:

If you’re using an existing table or pre-fabricated table vanity, be sure to adjust the height so that the top of the sink is no more than 34” from the floor. And make sure the legs are strong and stable, and ideally positioned at the very outer edges of the countertop.

If possible, choose a design that’s versatile enough to blend in with however each resident wants to customize their space.

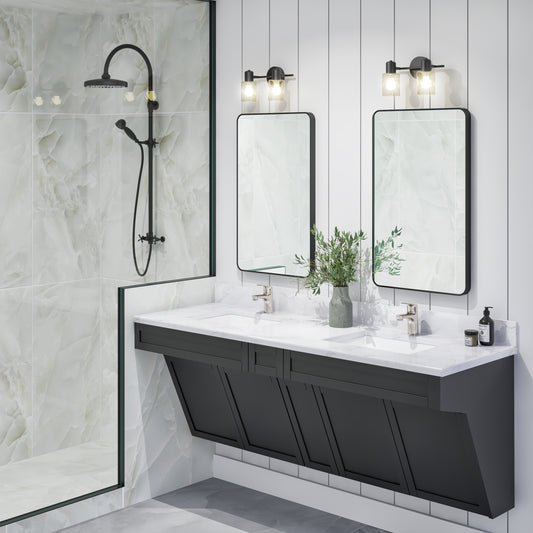
3. Enclosed Floating Vanity Sinks

Floating vanities are in this year, which is perfect for ADA bathroom sinks. 

A standard floating vanity won’t work for an accessible sink. But there are plenty of options out there for ADA-compliant floating vanities.

PROS:

  • Pipes and lines are completely covered and hidden.
  • Creates a modern, luxurious look.
  • Easy to tailor to a wide variety of designs.

CONS:

  • Can be expensive.
  • Needs specialized mounting brackets, which may take time for your team to learn how to install properly.
  • Front panel may interfere with knee space if it’s not installed at the right angle.
  • Storage can be a challenge.

How to make it work:

A floating vanity sink for an ADA bathroom sink may need storage added elsewhere in the room. However, you can find ADA floating vanities with storage added to the sides, which is an elegant solution residents will love.

Be sure to choose mounting brackets that can hold as much weight as possible, since you never know when someone will lean on the counter. Enclose the vanity in light to medium wood tones for a sealike look.

Our Top Recommendations for ADA Bathroom Sinks

We have a few recommendations for creating ADA bathroom sinks that will appeal to every resident.

  1. Go with an undermount bathroom sink. Undermount ADA basins are luxurious, easy to keep clean, and on-trend. They also prevent issues with a bulky lip that stands up over the countertop, which may throw off your 34” maximum basin height measurement.
  2. Consider a high-contrast faucet that will stand out against your countertop. This is a simple adjustment that makes the faucet more visible for people with limited sight.
  3. Choose a single-handle faucet. This is the best option for ADA bathroom sinks because it’s easy to turn on and off for people with limited use of their hands. It’s also the easiest way to comply with regulations for faucet controls.

When you’re looking for ADA bathroom fixtures, it’s important to choose designs that are manufactured to comply with regulations. That way, there’s no guesswork or risk that the basin won’t be compliant.

Allora USA makes it easy to get everything you need for every multifamily build in one place. We have ADA bathroom sinks and compatible faucets that match our standard designs, so every unit will get the same gorgeous fixtures.

Buying ADA fixtures from a reputable manufacturer means you know you’re getting products that meet regulatory and quality standards.

Plus we offer:

  • Discounts for commercial projects.
  • Guaranteed pricing.
  • Guaranteed stock.
  • Product warranties.
  • Fast customer support
  • Free shipping to most areas in the US.
  • Delivery within 5 days or less anywhere in the US.
  • Unlimited phone and email support.

A great ADA vanity sink starts with the perfect basin. Browse our selection of ADA bathroom sinks, or send us your specs and we’ll put together a list of options that will be a perfect fit.

With dedicated professional support, we’ll make it easy to get the right fixtures at the right price for this and all your future projects.

Back to blog

Not sure which sink or faucet is right for your build? Unsure which accessories you need?